

Key Takeaways
- Setting up a barcode inventory system consists of 4 easy steps: generating barcodes, labeling your inventory, utilizing scanners, and integrating software.
- You can start the process by preparing an inventory list to associate each product with a unique barcode.
- You can generate barcodes with a free online barcode generator or barcode font for internal purposes. However, for globally recognized barcodes, you’ll need to purchase GS1-registered barcodes.
- Once your barcodes are generated, you’ll need to print them using a barcode printer and attach them to your inventory.
- Barcode scanners have various options that range from affordable USB scanners to more advanced wireless smart scanners, depending on your specific needs. Even smartphones can double as barcode scanners.
- Integrating inventory management software with barcode functionality is the best way to barcode inventory items and get the most out of your barcode inventory system.
Over the years, we’ve had countless small businesses ask about barcodes or, more specifically, how to set up a barcode inventory system. So, by popular demand, we’ve crafted this short tutorial to show you how to set up a barcode inventory system quickly and painlessly!
We tried to keep this article simple, but if you’re interested in a more in-depth look at how to start barcoding your small business, check out our Ultimate Barcoding Guide. It covers absolutely everything related to barcodes.
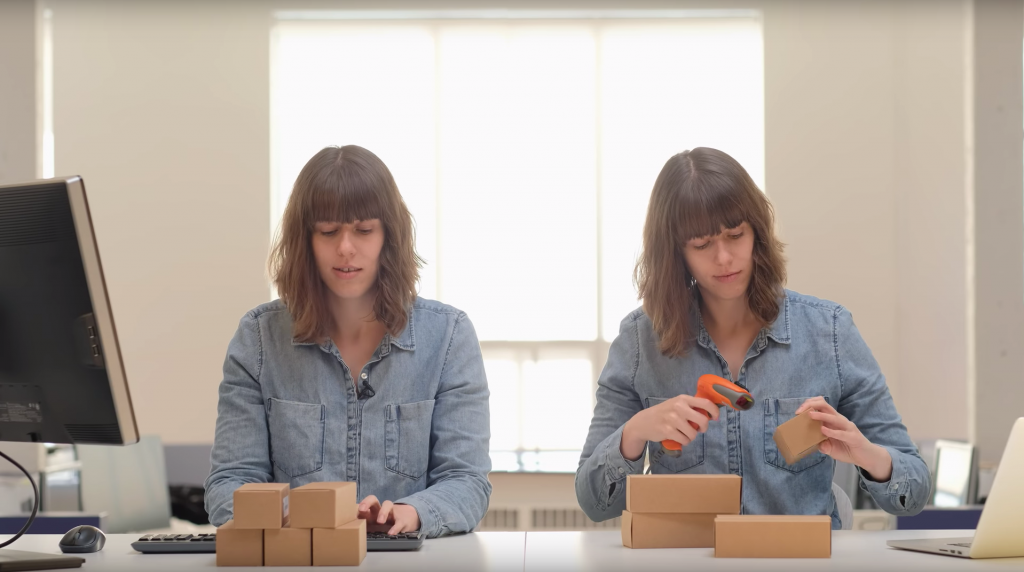
If you prefer video tutorials, you can find one below:

But since you’re here, this post provides some extra detail about the steps from our video for setting up a barcode inventory system.
Step 1: Generate barcodes for your barcoding inventory system
Before you can start scanning products, you need to assign a unique barcode to each item in your inventory. That process starts with organizing your product data, then choosing how you’ll generate and manage your barcodes.
Prepare your inventory list
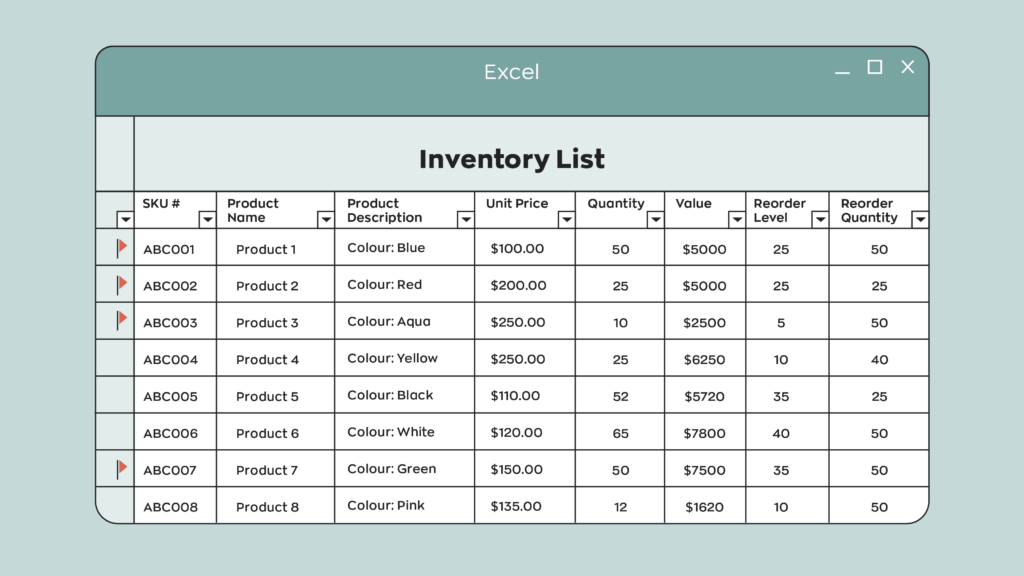
The first step is prepare an inventory list spreadsheet so that you can tie barcodes to specific products and start building your barcode inventory tracking system. This list serves as the foundation of your barcode system, since each barcode is tied to a specific item record.
If you haven’t prepared a spreadsheet, head over to our article about inventory lists. We walk you through what an inventory list is and how to create one. We’ve even included a free-to-download template to make your life easier. Our template is pretty barebones, but you can add any relevant information to your products, such as lot and serial numbers, for example.
A clean, well-structured inventory list will make the barcode setup process faster, more accurate, and much easier to maintain long-term.
As a quick final example, here’s what an inventory list spreadsheet could look like:
Generate barcodes (using a generator or software)
Once your inventory list is ready, you can start generating barcodes. You can use a free online barcode generator to generate barcodes one at a time. However, there is a better option. Barcode inventory software can automatically generate barcodes for each product. If you have custom-built software for utilizing barcodes, you can also do more with your barcode inventory system.
Internal vs. GS1 barcodes (for global use)
Generating your own barcodes, however, isn’t for everyone. If you need your barcodes to be recognized globally, you need GS1-registered barcodes. For those, you can visit our official inFlow GTIN Barcode Shop to purchase single barcodes for only $30 with no renewal fee. However, if you need more than ten barcodes, we recommend purchasing a company prefix directly from the GS1 website.
Choosing the right barcodes upfront will save you time, prevent relabeling later, and ensure your barcodes work wherever your products are sold.
Step 2: Print and apply barcode labels to your inventory
Now that you’ve got a spreadsheet of your products and corresponding barcodes, you’re one step closer to a complete barcode inventory system. Now it’s time to physically label your current inventory.
Labeling is often the most time-intensive part of the process, since every item (or storage unit) needs a label. For most businesses, this step takes several hours at a minimum, and sometimes a few days, depending on inventory size.
Choose a barcode label printer
To create your barcode labels, you’ll need a barcode label printer and software. We recommend the inFlow Portable Printer. It’s compact, wireless, and built for use in warehouses or on the go. This printer allows you to easily print labels directly from your phone, tablet, or computer, without being tied to a single workstation.
While you can get by with a standard office printer, a dedicated label printer produces scannable, durable labels much faster and more consistently, which makes a big difference when you’re labeling dozens or hundreds of items.
Design and print barcode labels
Before you start printing, you’ll want to decide what information appears on each label and how they’ll look. Understanding your company’s brand archetypes can significantly influence how you design your product labels, making them resonate more with your target audience.
There are options when it comes to the software you use to create your labels. You could opt for the “free”-ish option and just use Word, or Google Docs, or if you’re using inFlow we include a built-in label designer to make it easy for users to create custom labels.
Our tip is to stay moderate when adding fields first. Stick to the basics like Item Name and Barcode, and see how that fits with a few test prints. Remember that you’ll still want to be able to read some of the information on the labels, so having fewer fields on each label means they’ll be easier to skim.
Tips for labeling your inventory
Now it’s time for the most time-intensive part of the process. Slapping those labels on your physical inventory. Here’s some tips to help streamline the process.
- Plan for time and help: As we’ve mentioned, labeling is usually the most labor-intensive step. If you have a large stockroom, assigning multiple people to print, place, and verify labels can dramatically reduce setup time.
- Label consistently. Stick labels in the same place on every product or bin so your team never has to hunt for where to scan.
- Test before committing. Print a small batch of labels first and confirm that the barcodes scan and function as intended.
- Keep it going. Once your existing inventory is labeled, make barcode labeling part of your receiving process so every new item is tagged before it goes into storage.
Once you finish labeling everything you currently have, pat yourself on the back for a job well done. You’ve almost completed your inventory barcoding system. Just keep in mind it’s a good idea to keep the process going for any incoming products.
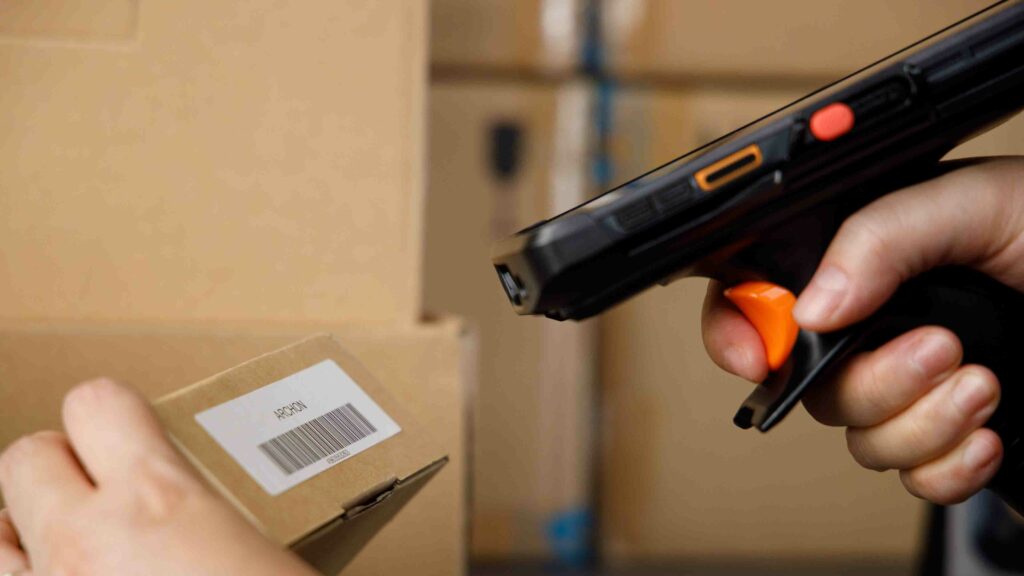
Step 3: Choose the right barcode scanners
Having barcodes on your products won’t do much good without a scanner to read them. Scanners come in all shapes and sizes, from small pen models to larger portable computing systems with built-in software. Today, you can even use the smartphone in your pocket to scan barcode labels. The barcode scanner you choose will depend on how often you scan and where you scan.
Using smartphones as barcode scanners
If you only scan occasionally, your smartphone may be enough to get started. With the right app, most modern phones can scan standard barcodes using their built-in camera. What’s great about this option is that it’s zero investment on your part. For very small teams or low-volume operations, smartphones can be a convenient entry point into barcode scanning.
However, phones aren’t built for repeated, high-speed scanning. As scan volumes increase, camera-based scanning becomes slower, more tiring for staff, and less reliable than purpose-built hardware.
Wired vs. wireless barcode scanners
For most businesses, we recommend buying a dedicated barcode scanner for your barcoding system. They can speed things up and save you a lot of time in the long run. Aside from being faster and more accurate, they’re also far more comfortable to use throughout the workday.
If you’re in the market for something affordable and reliable, you could pick up a wired USB scanner. These are an excellent option for anyone doing stationary barcode scanning, such as receiving desks, packing stations, or retail counters.
Wireless Bluetooth scanners offer more flexibility. They’re ideal if staff need to move between shelves, bins, or storage areas while scanning. Without cables, teams can work more freely and process inventory more efficiently across the floor.
Smart scanners for high-volume scanning
In busy warehouse or manufacturing environments, investing in a smart scanner is often the most efficient option. Smart scanners are great because you can download your barcode software directly onto the device, allowing staff to scan, receive, pick up, and adjust inventory from a single handheld unit. This reduces handoffs between devices, speeds up workflows, and minimizes errors.
For operations that require speed, mobility, and all-day scanning, smart scanners deliver the highest level of efficiency and control.
Step 4: Use inventory management software to tie your barcode system together
Scanners and label printers are important pieces of the barcode inventory system, but they don’t do much on their own. If you’re using barcodes for inventory management, you’ll need excellent inventory software to tie your barcode system together.
This is where inFlow fits in. It’s designed to support fully barcoded businesses, whether you’re starting from scratch or upgrading an existing process.
Generate and manage barcodes with software
With inventory software like inFlow, you can build your product list directly in the system or import it from an existing spreadsheet. Once your items are in place, you can generate unique barcodes for each product in just a few clicks.
From there, the software becomes your central source of truth for your barcode data. Each scan can update inventory levels, show product data, and much more.
Streamline label printing and scanning with software
When it’s time to physically label your product, inFlow can kickstart the process. It does this by showing your current stock and printing your labels straight to a printer. We also simplify printing labels straight from purchase orders, so you can add incoming stock to your barcode inventory system as it arrives.
Once barcodes are in place, scanning replaces manual data entry across your workflows. Items can be scanned onto sales orders, stock transfers, and work orders. A barcode system for small business inventory management can drastically reduce manual errors in these processes.
Final thoughts
Setting up a barcode inventory system takes some upfront effort, but the payoff is long-term accuracy, faster workflows, and better visibility across your business. From generating barcodes to labeling inventory and choosing the right scanners and software, each step builds toward a system that saves time and reduces costly mistakes.
We hope this post has helped you learn all the significant components of implementing a barcode inventory system. If you’d like to get started, inFlow can help!
FAQ
How much does it cost to set up a barcode system for a small business?
Basic barcode setup costs range from $200-800 for small businesses. This includes a USB scanner ($50-150), label printer ($100-300), and inventory software ($20-50/month). You can start even cheaper using smartphone scanning and free barcode generators for internal use.
Can I use existing barcodes on products or do I need to create new ones?
You can absolutely use existing manufacturer barcodes if your products already have them. For items without barcodes or internal inventory tracking, you’ll need to generate custom barcodes using free online generators, barcode fonts, or inventory management software like inFlow.
What’s the difference between free barcode generators and GS1-registered barcodes?
Free generators work perfectly for internal inventory tracking within your business. However, if you sell products through retailers or need globally recognized barcodes, you’ll need GS1-registered codes. These cost around $30 per barcode for small quantities.
How to implement a barcode system in manufacturing?
Manufacturing barcode implementation involves tracking raw materials, work-in-progress, and finished goods throughout the production process. Start by barcoding incoming materials at receiving and use scanning to support component picking and fulfillment. Manufacturing inventory software like inFlow can automate this process through bills of materials, component tracking, and production reporting tied to Manufacture Orders (MOs).
What features should I look for in barcode inventory management systems?
Essential features include built-in barcode generation and label printing, support for both 1D and 2D barcodes, and mobile scanning capabilities. Look for systems that offer purchase order and sales order integration, low stock alerts, and comprehensive reporting. Advanced features to consider include lot and serial number tracking and integration with accounting software.
What are the best barcode scanners for small business inventory tracking?
For stationary workstations, USB-wired scanners offer reliable, plug-and-play performance. For mobile operations, wireless Bluetooth scanners offer the freedom to move throughout the warehouse and storage areas. High-volume operations benefit from smart scanners that include built-in inventory software. Budget-conscious startups can begin with smartphone scanning, though this works best for occasional barcode scanning.
Good day
What barcode scanner and software would you recommened that can link with a free online barcode generator? (Which free barcode generator would you recommened?
We are based in Cape Town, South Africa.
Thank you.
Kind regards
Megan Joy
Hi Megan, we’re actually working on a new post to highlight some of the best barcode generators outside of inFlow. Here’s one of the generators we’re going to highlight: https://barcode.tec-it.com/
Which sales app uses barcode and can also show inventory level notifications..
I am writing from Nigeria. I intend to start a grocery store.
Please your answer would go a long way in helping me. Thanks.
Hi Echina, our software, inFlow Cloud, does offer barcode generation and scanning. We also track inventory.
We don’t have in-app notifications right now for inventory levels, but we do offer email notifications that you can get on a daily basis for low stock items.
If you’d like to try inFlow, we offer free trials and we have a team dedicated to help you get set up and learn how inFlow could best fit your business.
You can sign up for our trial here: https://www.inflowinventory.com/signup
hi can one of u guide me for set up a full barcode for my small business
Hi Pratham, we do offer onboarding as part of your inFlow trial. So we could show you how to set up barcodes at your business if you sign up here: https://www.inflowinventory.com/signup
how can i set up barcode system for my hardware shop
How do I generate a book publishing bar code for an ISBN 13 code. What information do I place onto the generator?
Hi Tony,
Here’s a free barcode generator that can generate ISBN 13: https://barcode.tec-it.com/en/ISBN13?data=9781234567897
From some quick Googling, it *does* look like there is meaning to the numbers in the ISBN, though, so I recommend doing further research to make sure it’s valid for usage. It looks like there are country, publisher, and title identifiers built into the numbers—as well as a check digit.
How does one use this software to set up a barcoding system both for their retail division, wholesaler division, and warehouse?
Hi KVH, good question.
The quick answer is that you’d usually tie a single barcode to each product, and that barcode would bring that product up each time you scan it into our software. inFlow also provides different pricing schemes so that you can have a separate retail and wholesale price for the same product, depending on who the customer is. If you’d like to learn more, I’d encourage you to start a free trial and our team will let you know if inFlow is the right fit for your business.
https://www.inflowinventory.com/signup
Hi, I’ve been trialing the system with my own personal business but I’d like to propose to my employer that we use this in my day job – the one feature I can’t seem to find though is location barcodes. Is it possible to do this with inflow or is the only way to put stock into a location to manually add it there?
Hi Jason, sorry, inFlow doesn’t have a feature specifically for location barcodes right now.
If your locations are barcoded, you can scan them into the Windows or web apps. Just not our mobile apps—you’ll have to pick from a location list).
But I’ve passed your feedback along to our team for consideration.
Thank you for this article… A great help as I am researching barcode information. We have a good size amount of camera and lighting gear here at Minneapolis College that we check-out to students and we need a better online system. Its nice to know this was written by a fellow Photographer!
What would you recommend for a small business that is currently using Quail?Having to key in everything at time of sale/pick up is timely and mistakes are happening too often. I’m looking for a way to implement barcode scanning but need to differentiate between around 10-15 different vendors.
Hey Kathy,
For me to better answer your question could you tell why you need to differentiate between the different vendors for items with the same SKU?
When we pass the items by the barcode reader, the software needs to show us the order ID number which this items belongs to. Let’s say there is 50 orders and we need to find which order this item belongs to. Can inFlow work this way?
Hi Henry,
Thanks for reading. If you were using the inFlow desktop application you could do this in a few steps:
1. First you would open your product page.
2. Then you would scan the item.
3. Check order history for unfulfilled orders.
4. Choose one and open it.
If you’d like to try it out yourself inFlow offers a 14 day free trial with no credit card required. We also have an amazing support team to help you test it out. Just click the button at the bottom of the article to get started.
All the best,
Jared
I have a customer that has been using our blister cards with barcodes for years. We changed the barcode on one product and generated the new barcode. I sent the customer one of the cards with the new barcode and they emailed me that the scanner is not reading it. Help!
Hey Richard,
Thanks for reading. I’m sorry to hear about the problem your customer is having with your barcodes. Without knowing more details, it’s hard to know exactly what the solution would be. That being said, if I were in your position, I would test the barcodes myself at my location to ensure they are working. Try testing with two different scanners (if you only have one scanner, you can use the camera on any smartphone as a second one). Also, it’s important to note that scanners may have a hard time reading smaller barcodes usually because printers have a hard time accurately printing barcodes that are so small. I’m not sure what type of barcodes you’re using (Code39, UPC, etc.), but if you’re creating barcodes yourself, such as code 128 of code 39, maybe an asterisk was not used at either the beginning or end of the code.
I hope one of these solutions helps!
Cheers,
Jared
I am a Generator contractor that deals with large quantities of machines, repair parts on service trucks. These items already have barcodes on them from the factory. But I do have other trucks that have oil, filters and spark plugs from the parts store. I just need help keeping up with all of this without a huge amount of trouble and expense per month.
Hey Dale,
From what you’re describing, our software would be a great solution for you. It sounds like your workflow is what we call a “mobile job site.” Essentially rather than storing your equipment and materials at a centralized location, your service trucks are acting as your warehouses. With inFlow, you could set up each truck as a different location and have your technicians/subcontractors use the barcodes (once you’ve set them up in the system) to scan the parts as they use them. Your system would automatically deduct those parts from your inventory levels. You could set reorder points so that when your stock reaches a certain level, you’ll be notified it’s time to order more. We even offer various costing methods to help you track the total cost of materials used. If you want to know for sure whether or not inFlow would work for you, please reach out to our sales team and explain to them what your situation is, and they can advise you whether or not inFlow would work for you. I hope this helps.
Cheers,
Jared
I am a bottled water manufacturer of different size bottles. I need a barcode system to keep track of the various pallets of water produced and in which warehouse they are/where stored.
Once the pallets are purchased by a distributor who picks them up at my factory/warehouse, I need them scanned “out” so that I can keep track of what was taken/sold and what my current inventory is.
Hey Tim,
If you’re looking for a barcode system that can do everything you mentioned, then look no further than inFlow. With inFlow you can use the existing barcodes on your products or generate new ones with our built-in label designer and barcode generator. You can use barcodes to adjust, transfer, or check your stock. Your purchase and sales orders are even barcoded for easy look-up (yes, we have POs and SOs!). You can use the POs and SOs to track all the comings and goings of your inventory and use barcodes to pick your orders faster and more accurately. We even have multi-location inventory tracking as well as sublocations.
If you want to know for sure whether or not inFlow would be a good fit for you, please reach out to someone from our sales team and explain your workflow. They’ll be able to tell you for sure whether or not inFlow would be a good fit for you.
Cheers,
Jared
Hi,
I have products to distribute which come with the parent company barcode. When I have to do a stock take, monthly, I’d like to be able to just scan the barcodes rather than manually check product codes against a spreadsheet. Is this possible and what would I need to achieve this, please?
Hi Tony,
From the sounds of it you’re looking for an inventory system that has barcode capabilities, which is exactly what inFlow is. With our software you can create product listings for your products and pair them with existing barcodes or generate new ones in the app. Once they’re setup you can easily scan barcodes to receive products.
Other than software you’re going to need a scanner (since your products already have barcodes you won’t need a printer). For scanners it depends on your use case. But if you’re scanning a lot I would recommend a laser scanner. If you’re only scanning every so often you can get by using a smart phone.
I would recommend reaching out to our sales team and go over your workflow in detail. They can give you an honest answer whether or not we’d be a good fit for you.
Cheers,
Jared
We are a small, non profit art organization that offers its members an opportunity to sell their art at an annual sale. Up to 800 pieces may be on display throughout the sale. Currently, all work is manually ‘received’, which can be a bit tedious. At the end of the sale, we carefully check that all unsold works are returned to the artists – another manual process that can be chaotic and frustrating. Could barcoding help streamline the process while maintaining accuracy?
Hey Lois,
It sounds like barcoding the paintings would be a great option if you’re looking to speed up the process and increase accuracy. The only trouble with this would be setting all of your paintings up in the system. You would need to create 800 separate products in your database since I assume each of the paintings is unique. However, if you have all of the paintings already listed in a spreadsheet you could import that into an inventory management system like inFlow to streamline the process. If you want to know for sure if our software could help, please reach out to our sales team and explain to them your workflow. They’ll be able to give you an honest answer as to whether or not we’re a good fit for you and what your workflow would look like. I hope this helps.
Cheers,
Jared
Hello, do you operate outside of the USA?
Hey Eric,
Yes we do! We have inFlow users worldwide.
Cheers,
Jared
I sit possible to create a barcode link to your software for promotion products that have a value of $0? We still want digital record of these promotion products
Hey Anuj,
I’m not entirely sure how that would work with GS1-registered barcodes. You’ll have to contact GS1 directly for more information about that.
Cheers,
Jared
Need new inventry manegment stystem like barcode makeing and scaning prosseds
Hey OM,
If you’re looking for an inventory management system with a complete barcoding system built right in, you came to the right place. With our software inFlow you can generate, print, and scan barcodes for all of your inventory. You can click the button at the bottom of this article to start a 14-day free trial and see if inFlow is right for you. You can use our sample database to check things out or create one of your own.
Cheers,
Jared