How to use inFlow in other languages
Do you want to use inFlow in another language? Right now, there are three partial translations included with inFlow Inventory (French, Spanish, Chinese). Take a look at the steps below for more information.
Windows
Please note: partial translations is only supported in inFlow Inventory for Windows.
Why only partial translations?
As mentioned, inFlow can be partially translated into French, Spanish, and Chinese. Because of the current speed of updates and the low usage of non-English languages within our community, we have chosen to focus our efforts on building up inFlow features for now. This means that some languages may not be fully translated within the software, and we do apologize for any inconvenience there.
If you are working with a partial translation, or your preferred language is not included in the software, you can update untranslated labels or fields yourself. Simply export the program labels/fields to Excel, translate them (or have someone else translate them for you), and then import your file back into inFlow.
How to change the language settings
The language setting in inFlow is personal — this means if you’ve created multiple team members in your inFlow Inventory account, they can each choose to use inFlow in any one of the official translations (English, French, Spanish, and Chinese). It’s not a global setting.
To change your display language
- Go to Main Menu > Options > Personal Settings.
- Click the Display Language drop-down near the bottom of the window.
- Choose the language you wish to use: English, Español, Français or 简体中文 (Simplified Chinese).
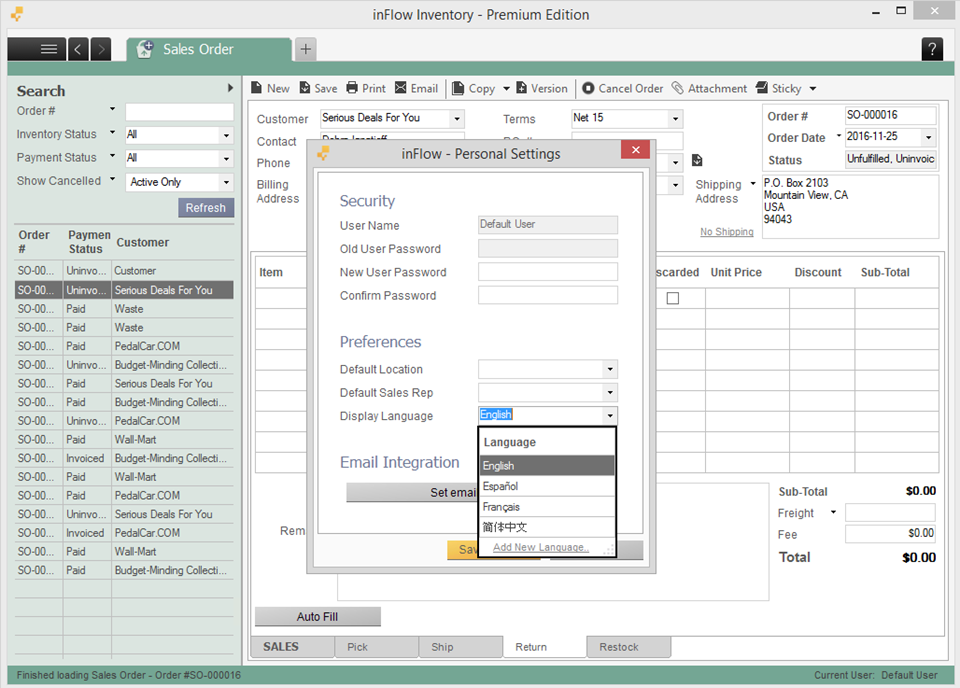
Please also note that with older versions of Windows, you will sometimes have to install the East Asian characters when attempting to switch to Chinese.
How to import other languages into inFlow
inFlow can help you import your own language into the program, but first, you need to translate the labels.
To get a copy of the label file
- Go to Main Menu > General > Export Data.
- Choose Language as your data type and click Next. The file will be exported to CSV.
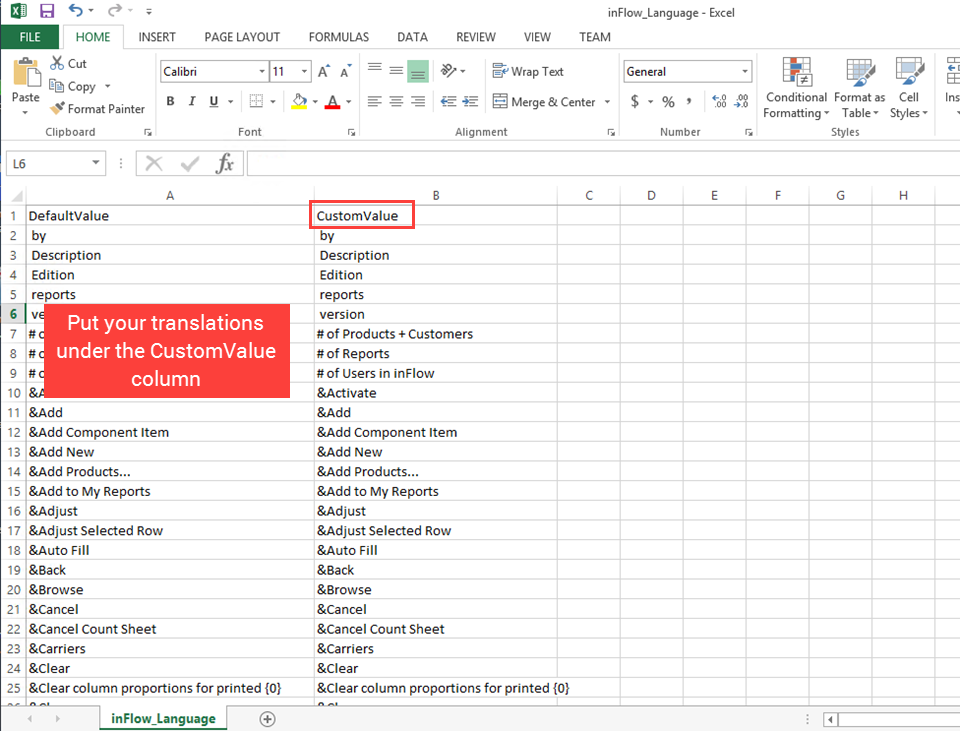
- Open this file in Microsoft Excel (or some other program if you prefer) and add the translations to your own language into the Custom Value column (column 2).
- Click File > Save as and then make sure to save it as a CSV (Comma Delimited) type file.
See the example screenshot below of an “English” translated file. Leave the first column alone and put in the translations of the information on the left under the CustomValue column.
Once you are satisfied with the new language entries, you can import the language back into the program in the same manner.
To import the translated labels
- Go to Main Menu > General > Import Data.
- Choose the language name to import.
- Select the Add new language.. option and enter the name of the language you’re importing into the field provided.
- Click Save & Close, then select your new language name from the updated drop-down list.
- Click Next to import the language.
Please note: When saving a PDF using some non-English languages, there is a known issue in which Adobe will not display the proper characters (instead showing squares). We suggest saving the file to Microsoft Word and using a PDF printer instead.


0 Comments